Android Gradle配置说明
本文共 8712 字,大约阅读时间需要 29 分钟。
文章目录
Android Gradle说明
Gradle是Android的构建工具。
Android项目整体结构
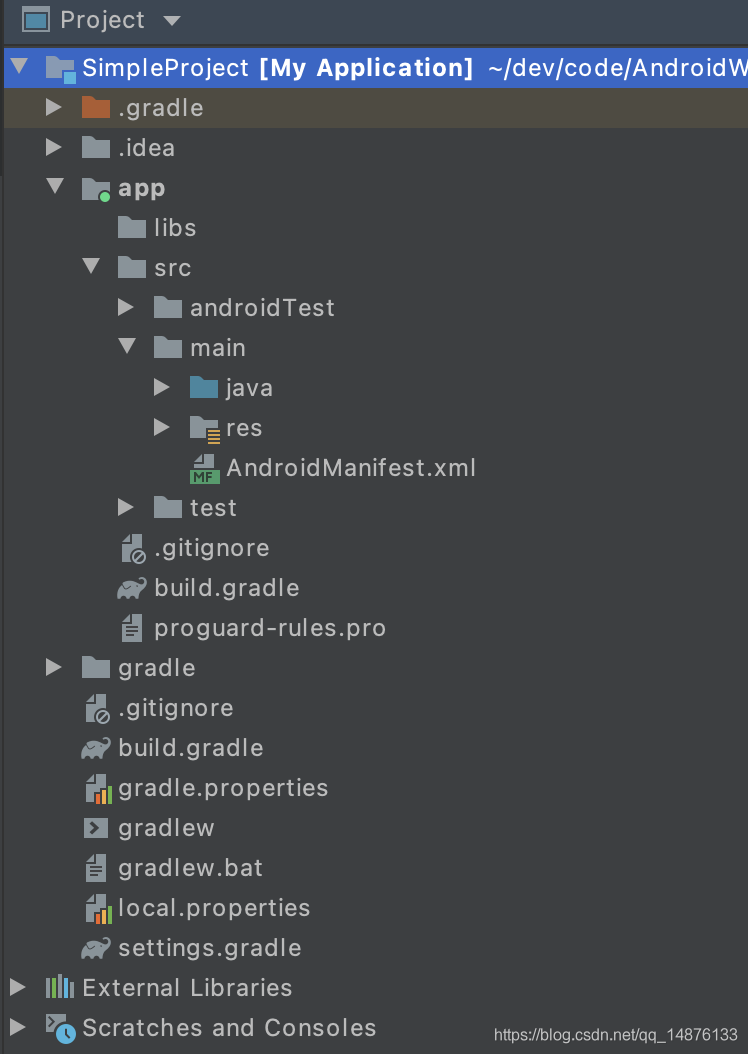
- 项目
build.gradle:配置项目的整体属性,比如指定使用的代码仓库、依赖的gradle插件等。 - 模块
builde.gradle:配置当前模块。 gradle-wrapper.properites:配置gradle版本信息等。gradle.properties:配置gradle编译参数。settings.gradle:管理项目和模块。local.properties:配置SDK路径。
项目build.gradle
//构建时的依赖buildscript { repositories { google() jcenter() } dependencies { //gradle插件版本 classpath "com.android.tools.build:gradle:4.1.2" }}//项目的依赖allprojects { repositories { google() jcenter() }}task clean(type: Delete) { delete rootProject.buildDir} 模块build.gradle
//声明是一个应用模块plugins { id 'com.android.application'}android { //编译时SDK版本 compileSdkVersion 30 //Android构建工具版本 buildToolsVersion "30.0.3" defaultConfig { //App唯一id/包名 applicationId "com.example.myapplication" //App支持最低SDK版本 minSdkVersion 21 //基于SDK开发版本 targetSdkVersion 30 //内部版本号,控制App升级 versionCode 1 //版本名称,展示给用户 versionName "1.0" } //配置签名文件 signingConfigs { release { //签名文件 storeFile file('./key.jks') //签名文件密码 storePassword "111111" //别名 keyAlias "app" //别名密码 keyPassword "123456" } debug { storeFile file('./key.jks') storePassword "111111" keyAlias "app" keyPassword "123456" } } //构建不同类型的apk buildTypes { release { //设置签名文件 signingConfig signingConfigs.release //开启混淆 minifyEnabled true //配置混淆文件 proguardFiles getDefaultProguardFile('proguard-android-optimize.txt'), 'proguard-rules.pro' //配置清理未使用的资源 minifyEnabled true shrinkResources true //开启zipalign优化 zipAlignEnabled true } debug { signingConfig signingConfigs.debug minifyEnabled false proguardFiles getDefaultProguardFile('proguard-android-optimize.txt'), 'proguard-rules.pro' //配置appcationId的后缀 applicationIdSuffix '.debug' //配置versionName的后缀 versionNameSuffix "_debug" } } compileOptions { sourceCompatibility JavaVersion.VERSION_1_8 targetCompatibility JavaVersion.VERSION_1_8 }}dependencies { //依赖libs目录下的jar包 implementation fileTree(include: ['*.jar'], dir: 'libs') implementation 'androidx.appcompat:appcompat:1.2.0' implementation 'com.google.android.material:material:1.2.1' implementation 'androidx.constraintlayout:constraintlayout:2.0.4' testImplementation 'junit:junit:4.+' androidTestImplementation 'androidx.test.ext:junit:1.1.2' androidTestImplementation 'androidx.test.espresso:espresso-core:3.3.0'} - implementation可以让module在编译时隐藏自己使用的依赖,但是在运行时这个依赖对所有模块是可见的。而api与compile一样,无法隐藏自己使用的依赖。
- 如果使用api,一个module发生变化,这条依赖链上所有的module都需要重新编译,而使用implemention,只有直接依赖这个module需要重新编译。
如果你觉得jks密码放在build.gradle里不安全,可以把相关密码放在不加入版本控制系统的gradle.properties文件里:
STORE_PASSWORD=xxxxxxKEY_PASSWORD=xxxxxx
release { storeFile file("hello.jks") // jks路径 storePassword STORE_PASSWORD // jks密码 keyAlias "xx" // 别名 keyPassword KEY_PASSWORD //别名密码} 自定义输出apk名称
//applicationVariants Android应用Gradle插件applicationVariants.all { variant -> variant.outputs.all { output -> def outputFile = output.outputFile if (outputFile != null && outputFile.name.endsWith(".apk")) { def appName = "test" def buildType = variant.buildType.name def versionName = defaultConfig.versionName def versionCode = defaultConfig.versionCode def buildTime = new Date().format("yyyyMMdd") outputFileName = "${appName}_${buildType}_v${versionName}_${versionCode}_${buildTime}.apk" } }} gradle依赖管理
gradle默认是支持依赖传递的,如项目C依赖项目B,项目B依赖项目A,这样可能会导致重复依赖、依赖错误等问题。
禁止依赖传递
//禁止指定库依赖传递implementation('com.xxx.xxx:xxx:1.1.1') { transitive false} //关闭当前模块等依赖传递configurations.all { transitive = false} 处理依赖冲突
configurations { all*.exclude group: 'com.android.support', module: 'support-annotations'} 全局配置
在根目录下新建config.gradle文件,并添加代码:
ext { //组件独立开关 isModule = false //Android相关 android = [ compileSdkVersion : 30, applicationId : "com.example.myapplication", applicationId_chat : "com.example.chat", applicationId_contact: "com.example.contact", applicationId_find : "com.example.find", applicationId_me : "com.example.me", minSdkVersion : 21, targetSdkVersion : 30, versionCode : 1, versionName : "1.0" ] //依赖库 dependencies = [ "appcompat" : 'androidx.appcompat:appcompat:1.2.0', "material" : 'com.google.android.material:material:1.2.1', "arouter-api" : 'com.alibaba:arouter-api:1.5.1', "arouter-compiler": 'com.alibaba:arouter-compiler:1.5.1', "circleimageview" : 'de.hdodenhof:circleimageview:3.0.0' ]} 在根目录下的build.gradle里加在:
apply from: "config.gradle"
在module中使用:
android { compileSdkVersion rootProject.ext.android["compileSdkVersion"] defaultConfig { applicationId rootProject.ext.android["applicationId"] minSdkVersion rootProject.ext.android["minSdkVersion"] targetSdkVersion rootProject.ext.android["targetSdkVersion"] versionCode rootProject.ext.android["versionCode"] versionName rootProject.ext.android["versionName"] }} 在dependencies 节点的使用:
dependencies { implementation rootProject.ext.dependencies["appcompat"] implementation rootProject.ext.dependencies["material"] implementation rootProject.ext.dependencies["circleimageview"]} implementation、api区别
api:支持传递依赖
例如:模块app依赖library1,library1依赖library2,那么app可以调用library2的api。同时library2的代码改变会导致app的重新编译。
implementation:不支持传递依赖
例如:模块app依赖library1,library1依赖library2,app不能调用library2的api。
productFlavors
在Android Studio中创建一个新项目时,applicationId默认是和项目的包名一致的。所以常常有开发者会将两者混淆,以为它们是一个概念。实际上应用ID和包名是相互独立的。改变包名不会影响应用ID,反之亦然。
- flavorDimensions:风味维度,新版本Android必须指定一个维度
- productFlavors:风味,配置多渠道
单维度
配置多渠道
flavorDimensions 'channel'productFlavors { xiaomi { applicationId 'com.test.appid_xiaomi' buildConfigField "String", "baseUrl", '"www.xiaomi.com"' resValue "string", "tip", "hello 小米" manifestPlaceholders = [CHANNEL_VALUE: "xiaomi", APP_NAME : "小米"] } huawei { applicationId 'com.test.appid_huawei' buildConfigField "String", "baseUrl", '"www.huawei.com"' resValue "string", "tip", "hello 华为" manifestPlaceholders = [CHANNEL_VALUE: "huawei", APP_NAME : "华为"] }} 替换manifest文件
BuildConfig配置常量
Log.e("TAG", "baseUrl " + BuildConfig.baseUrl);Button button = findViewById(R.id.button);button.setText(getString(R.string.tip)); 定制apk名称
applicationVariants.all { variant -> variant.outputs.all { output -> def outputFile = output.outputFile if (outputFile != null && outputFile.name.endsWith(".apk")) { //渠道名 def flavorsName = variant.productFlavors[0].name outputFileName = "app_${flavorsName}.apk" } }} 多维度
flavorDimensions 'channel', 'app'productFlavors { v1 { dimension "app" applicationId 'com.test.appid_v1' } v2 { dimension "app" applicationId 'com.test.appid_v2' } xiaomi { dimension "channel" applicationId 'com.test.appid_xiaomi' manifestPlaceholders = [CHANNEL_VALUE: "xiaomi", APP_NAME : "小米"] buildConfigField "String", "baseUrl", '"www.xiaomi.com"' } huawei { dimension "channel" applicationId 'com.test.appid_huawei' manifestPlaceholders = [CHANNEL_VALUE: "huawei", APP_NAME : "华为"] buildConfigField "String", "baseUrl", '"www.huawei.com"' }} public final class BuildConfig { public static final boolean DEBUG = Boolean.parseBoolean("true"); public static final String APPLICATION_ID = "com.test.appid_huawei.debug"; public static final String BUILD_TYPE = "debug"; public static final String FLAVOR = "huaweiV1"; public static final String FLAVOR_channel = "huawei"; public static final String FLAVOR_app = "v1"; public static final int VERSION_CODE = 1; public static final String VERSION_NAME = "1.0_debug"; // Field from product flavor: huawei public static final String baseUrl = "www.huawei.com";} 转载地址:http://zrqxz.baihongyu.com/
你可能感兴趣的文章
MYSQL CONCAT函数
查看>>
multiprocessing.Pool:map_async 和 imap 有什么区别?
查看>>
MySQL Connector/Net 句柄泄露
查看>>
multiprocessor(中)
查看>>
mysql CPU使用率过高的一次处理经历
查看>>
Multisim中555定时器使用技巧
查看>>
MySQL CRUD 数据表基础操作实战
查看>>
multisim变压器反馈式_穿过隔离栅供电:认识隔离式直流/ 直流偏置电源
查看>>
mysql csv import meets charset
查看>>
multivariate_normal TypeError: ufunc ‘add‘ output (typecode ‘O‘) could not be coerced to provided……
查看>>
MySQL DBA 数据库优化策略
查看>>
multi_index_container
查看>>
MySQL DBA 进阶知识详解
查看>>
Mura CMS processAsyncObject SQL注入漏洞复现(CVE-2024-32640)
查看>>
Mysql DBA 高级运维学习之路-DQL语句之select知识讲解
查看>>
mysql deadlock found when trying to get lock暴力解决
查看>>
MuseTalk如何生成高质量视频(使用技巧)
查看>>
mutiplemap 总结
查看>>
MySQL DELETE 表别名问题
查看>>
MySQL Error Handling in Stored Procedures---转载
查看>>